
Part of our Building Your First Ham Radio Station guide.
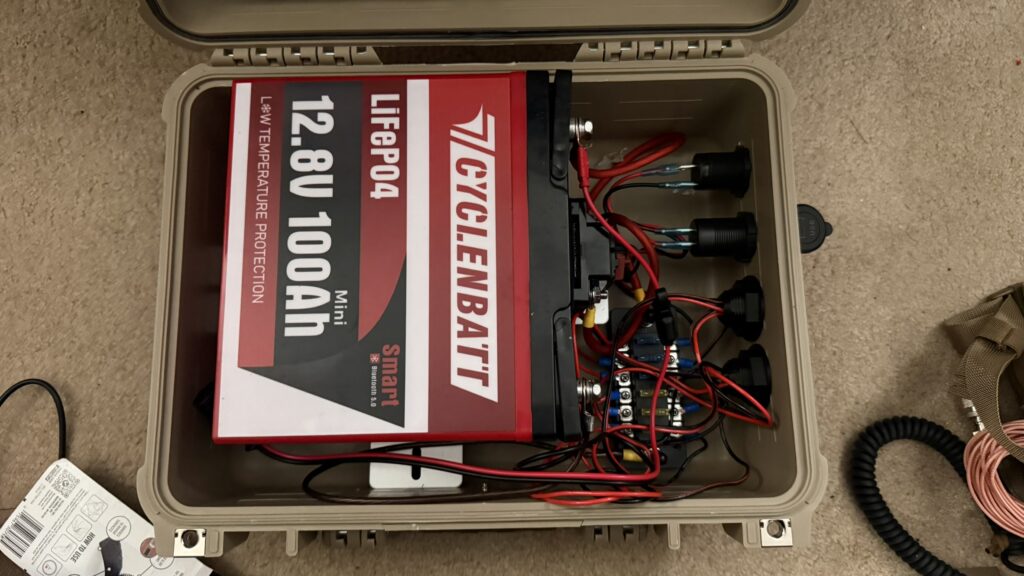
This is a simple build that took about 30 minutes from start to finish (the photos below are older ones taken while I was putting it together). Building your own 100Ah battery box is way cheaper than buying a pre-built one, and it’s a genuinely good learning experience if you haven’t done a project like this before, nothing here is complicated, but it touches wiring, fusing, and charging in a way that translates to a lot of other radio and off-grid projects.
What each part is actually doing
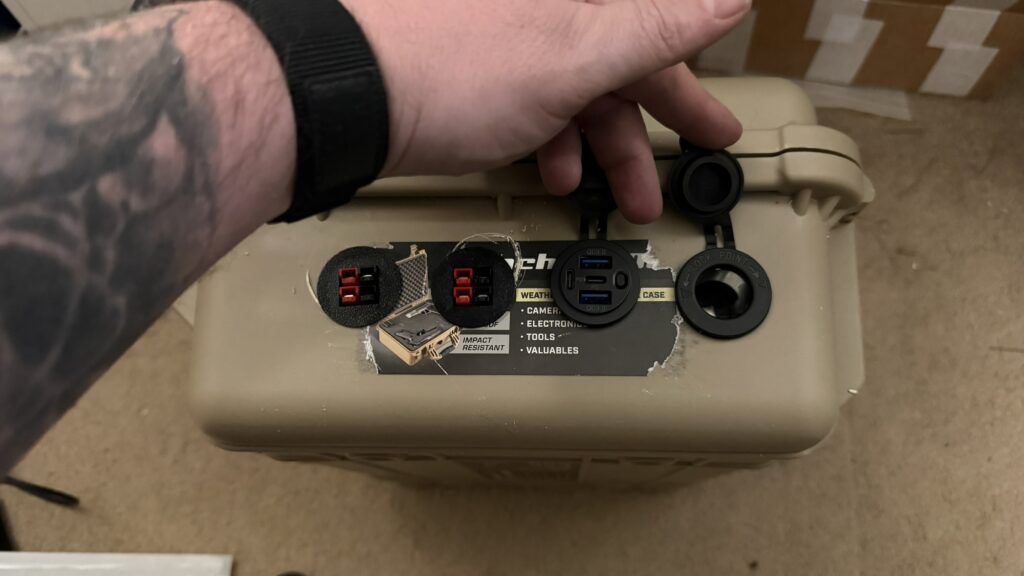
This isn’t just a battery in a box, it’s a small self-contained power system. The battery is the storage. The circuit breaker protects the whole system from a short or overload. The Powerpole bulkhead adapter gives you a fast, standardized way to plug radios and accessories in and out without fumbling with terminals in the field. The solar controller and panel let you recharge it under sun without any other input, while the DC-DC charger lets you top it off from a vehicle’s alternator on the drive out. The fuse block distributes power out to multiple accessories safely, and the 12V socket and USB outlet round it out for charging whatever else needs power at the operating position.
Parts list
- 100Ah Battery – link
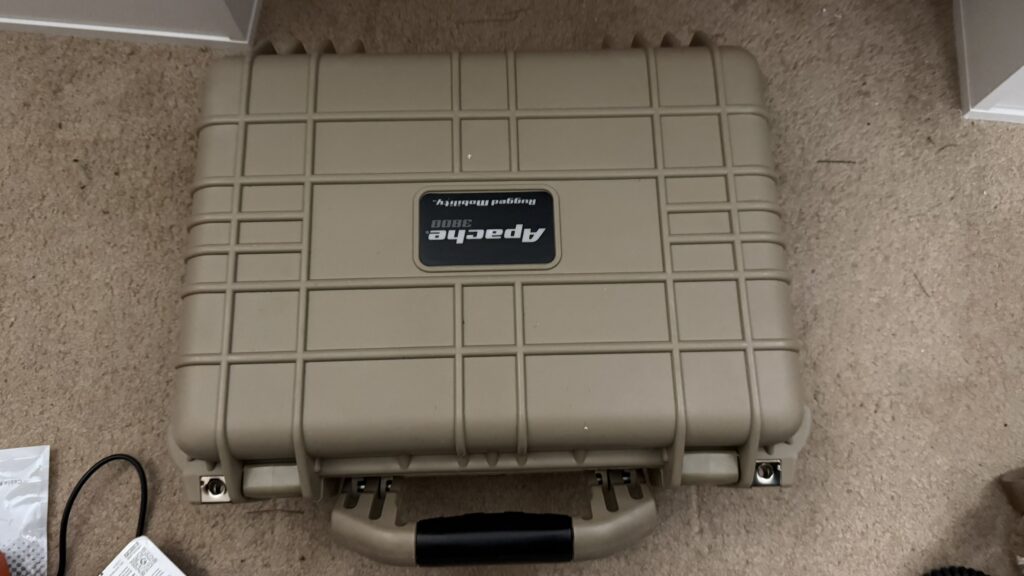
- Apache Case – link
- 100Amp Circuit Breaker – link
- Powerpole Bulkhead Adapter – link
- MPPT Solar Controller – link
- 200 Watt Solar Panel – link
- 12V DC to DC Charger – link
- 12V Fuse Holder / Power Distribution Point – link
- 12V Socket – link
- 12V USB Outlet – link
If you’re new to this kind of build, start with the battery, breaker, and Powerpole adapter, that alone gets you a usable, protected field power box. The solar and DC-DC charging pieces are worth adding once you know how you’ll actually be recharging it day to day.
Three ways I charge this battery box
The MPPT solar controller and the DC-DC charger both live permanently inside the box, wired straight to the battery. The NOCO charger itself stays outside the box, but its pigtail adapter is wired in and left connected, so charging just means plugging the right cable into the right pigtail depending on how I’m charging that day.
Solar: Renogy 200W panel through the MPPT
For solar charging, I connect the Renogy 200 watt portable panel directly to the MPPT controller’s pigtail on the outside of the box. The MPPT handles the rest, regulating the panel’s output down to a proper charge profile for the battery, no separate controller or extra gear needed in the field. This is the setup I reach for during a POTA activation or any extended outdoor session where I want to top off the battery without touching the vehicle or AC power at all.
Vehicle power: 8A DC-DC charger and a Powerpole connector
When the battery box is riding along in the vehicle, I charge it off the vehicle’s 12V system through the 8A DC-DC charger, which is also wired permanently inside the box. A Powerpole connector on the outside lets me plug straight into the vehicle’s 12V power, and the DC-DC charger takes care of converting that into a proper charge for the LiFePO4 battery instead of just feeding it raw alternator voltage. This is the charging method that gets the most use, since the box spends a lot of time in the Jeep between trips anyway.
AC power: NOCO 10A charger
For charging off wall power, I use a NOCO 10A charger. The charger’s pigtail adapter is wired into the box permanently, so all I have to do is connect the actual NOCO charger to that pigtail whenever I want to charge from AC. This is the method I use at home between trips, when I want the battery topped off and ready to go without waiting on sun or a drive.
Curious how this stacks up against just buying a commercial power station? I put it head-to-head with the EcoFlow Delta 3, Jackery 1000 v2, and Predator 350 on capacity, solar performance, and price.